

One of the main features of websites and blogs is the ability to receive comments from the audience, so that with this feature he can communicate with the users of his site or blog, and of course, this feature has appeared very powerful in WordPress, you can easily manage Pay full attention to the feedback you receive.
Comment management in the WordPress
In order to be able to take advantage of the ability to receive comments on your website, you must first go to settings, then dialogue, and manage it, and you will enter the management environment of receiving comments according to the image below.
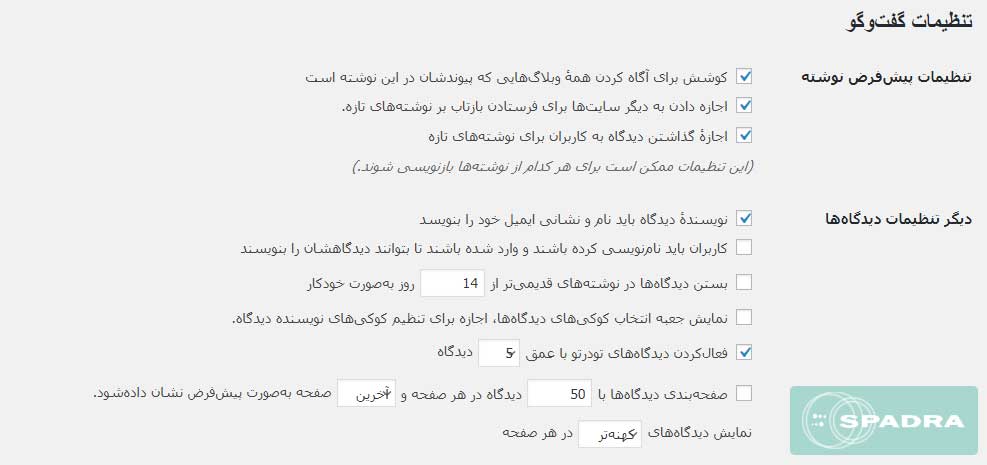
In this section, we are faced with settings that we will review.
Default settings post:
It is specific to site and blog notifications that will inform you of the creation of a . For example, if the option “Try to notify all blogs whose link is in this article” is active, if the site you have linked to uses WordPress, your site will notify that site through a comment. .
Other Settings:
This section is related to specifying the number of views and pagination and their display type, which is clearly explained for each option.
Email me whenever:
You can activate this section to be notified or sent to your email when a comment is sent to you.
Before the Comment is displayed:
With the help of this option, you can declare how the comments should be approved and then published
Opinion Comment:
This section is basically a security section for WordPress sites in their comments section. In this way, it prevents spam comments to a great extent, and you can also define which words to be sensitive to and put them in the approval queue if creating comments is free.
Black list comments:
Using this section, you can tell WordPress what words are spam, if you add a list of spam words, WordPress will automatically delete that comment.
Profiles:
In this section, you can define how the avatar of your users should be displayed, and each section is explained separately and completely.